This documentation focuses on data transfers to/from HPC using SCP/SFTP mechanism. There are now other mechanisms using Open OnDemand and Globus. Please see the respective pages:
- File Management and Transfer using Open OnDemand
- Data transfer using Globus Connect
- (NEW 2021!) You can now share data with external collaborators without HPC access using Globus!
¶ SCP/SFTP For Windows
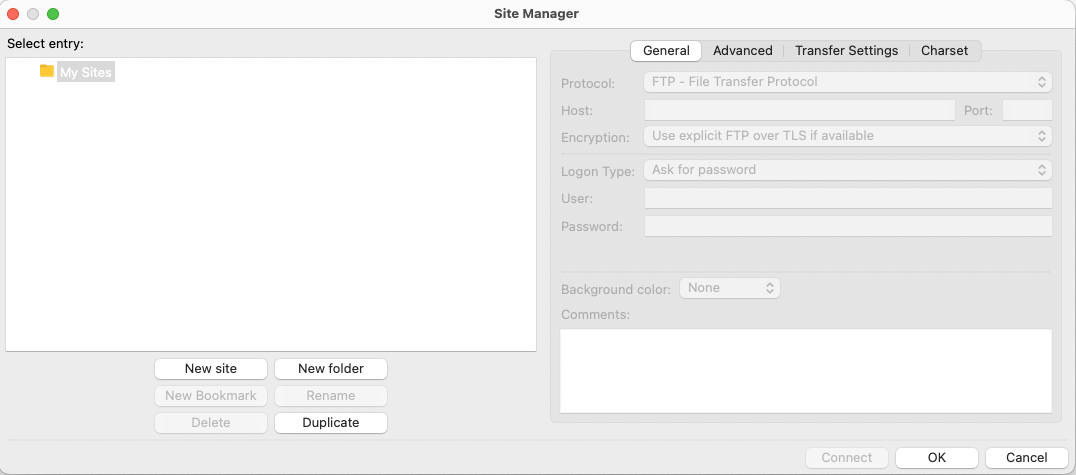
We recommend using WinSCP to transfer files to and from the cluster. To view their download page, visit here. After you download and install the application, it needs to be configured to connect to the cluster (either Turing or Wahab).
-
Go to File -> Site Manager -> New Site

-
Input your information. This only need to be done once.

You can click Login once you are finished.
¶ SCP/SFTP command linux For macOS/Linux/Windows
SCP/SFTP command linux is very powerful and convenient, it is available by default on macOS and most of linux distribution.
¶ SCP
scp is cp over ssh protocol, it works almost like cp, here is a example:
-
Copy data from local to cluster:
scp file MIDAS_USERNAME@turing.hpc.odu.edu: scp file MIDAS_USERNAME@wahab.hpc.odu.edu: -
Copy data from cluster to local:
scp MIDAS_USERNAME@turing.hpc.odu.edu:file . scp MIDAS_USERNAME@wahab.hpc.odu.edu:file . -
When copying a directory, add
-rscp -r MIDAS_USERNAME@turing.hpc.odu.edu:dir . scp -r dir MIDAS_USERNAME@wahab.hpc.odu.edu: -
You can add additional path on either side of command, for example:
scp MIDAS_USERNAME@turing.hpc.odu.edu:~/dir/abcd .
scp ./data/abcd MIDAS_USERNAME@turing.hpc.odu.edu:/scratch-lustre/dir/abcd
¶ SFTP
sftp command is useful when multiple file operation is needed.
-
Start
sftpsftp MIDAS_USERNAME@turing.hpc.odu.edu sftp MIDAS_USERNAME@wahab.hpc.odu.edu -
There are two path system in sftp, one is local path, and another is remote path. Most sftp command starts with
lmeans it works on local, nonelversion means it works on remote -
List local files
lls -
Change local current directory
lcd path -
List remote files
ls -
Change remote current directory
cd path -
Download a file
get filename -
Download a directory
get -R directory_name -
Upload a file
put filename -
Upload load a directory
mkdir directory_name # sftp require directory to exist first
put -R directory_name
¶ SCP/SFTP over Filezilla
FileZilla supports SCP/SFTP on Windows, MacOS, and Linux platforms.
FileZilla offers a bundled version with additional "sponsored" software and an unbundled version (no extra stuff). For this reason, we recommend you to look into other alternatives before considering FileZilla. If the use of WinSCP or sftp command is not possible, then FileZilla is still a viable choice. Please read the following blog article for a helpful guidance to avoid installing the extraneous, unneeded software on your machine.
Pay close attention to the name of the downloaded file:
- this is an example of a Windows installer of the bundled version
FileZilla_3.48.1_win64_sponsored-setup.exe
- this is an example of a Windows installer of the a unbundled version
FileZilla_3.48.1_win64-setup.exeDownload the latest version for your OS here.
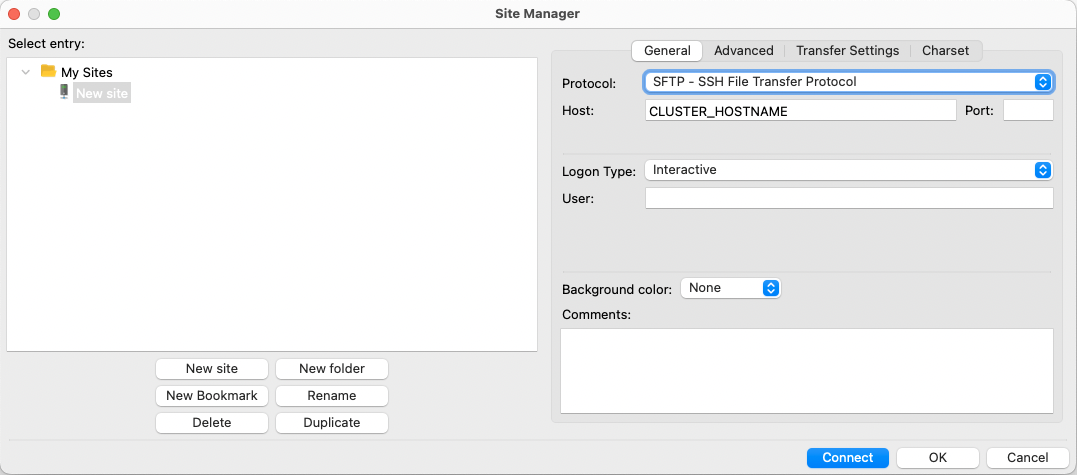
After you download and install the application, it needs to be configured to connect to the cluster (either Turing or Wahab).
-
Go to File -> Site Manager -> New Site

-
Input your information. This only need to be done once. Please select "Interactive" as Logon Type

You can click Connect once you are finished. -
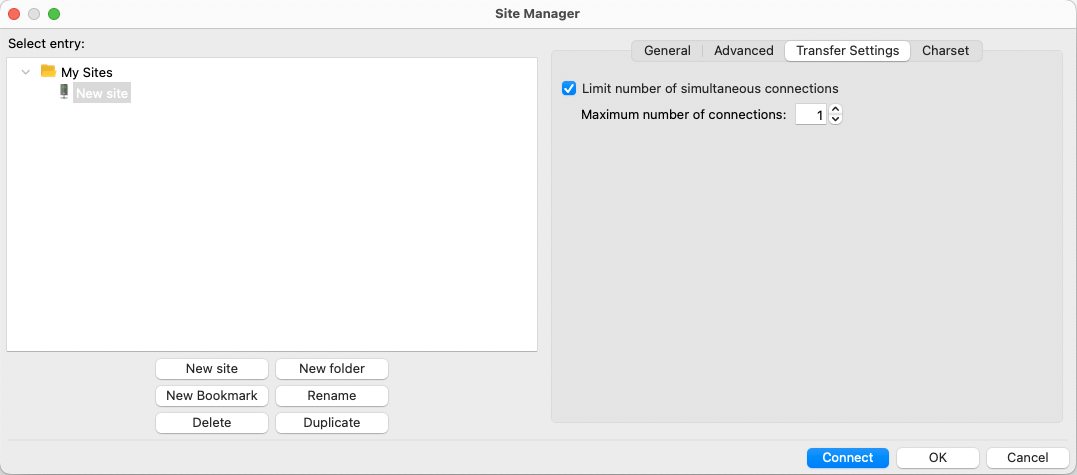
Go to Transfer Settings

Enable "Limit number of simultaneous connections" and set the number to "1"
¶ Globus
For transferring extremely large dataset (think: many gigabytes and beyond), please look into using Globus as a more reliable option. This option requires tha both the sending and receiving parties have Globus services. ODU's Globus subscription allows data sharing. This means that ODU researchers can share a dataset or folder on /home or /RC with their external collaborators. Depending on the permission granted to the collaborators, they can read or write the data in the shared folder. To learn more, please visit one or more of these web pages:
- Globus Connect Overview -- Instructions on using Globus Web Portal to upload, download, and transfer data.
- Data Sharing with Globus -- Instructions on using Globus to share data with external researchers.
¶ Mass Storage
Mass storage is meant for long-term storage of data that is not actively used for computation/analysis on HPC. Mass storage can be accessed from HPC login nodes as well as from user's desktop/laptop computers.
There are two types of allocations of mass storage:
- Individual storage allocation, which is similar to regular HPC home directories
- Group storage allocation, which is meant for data sharing & collaboration within a research group
Individual storage allocation comes automatically with access to HPC. Group storage allocation may be requested by emailing rcc@odu.edu with the following information:
- Name of the group leader (the PI);
- Name of the group;
- Members of the group (names and their MIDAS ID) to have access to the group storage allocation;
- Requested size (if greater than 1TB), with explanation for the need of that much space.
¶ Access from Cluster
/RC is available on login node on Both Turing and Wahab cluster.
/RC/home/YOUR_USERNAMEfor individual request/RC/group/YOUR_GROUP_NAMEfor group request- Initial space quota is 1 TB
- Additional space can be added by sending an email to rcc@odu.edu with the size of the additional space requested, and the reason(s) for the request.
Since
/RCis meant to be a long-term (archival) storage, it is not made accessible on the HPC compute nodes. Researchers need to move the needed data manually (or using a script) to the scratch partition for processing via regular HPC jobs.
¶ Access from Windows
- If your workstation is managed by ODU ITS and on the
ts.odu.edudomain, you should see aR:drive under your Computer. - If that is not the case or you are accessing ODU from VPN, you may map the
\\research1.ts.odu.edu\RCdrive with the following steps:-
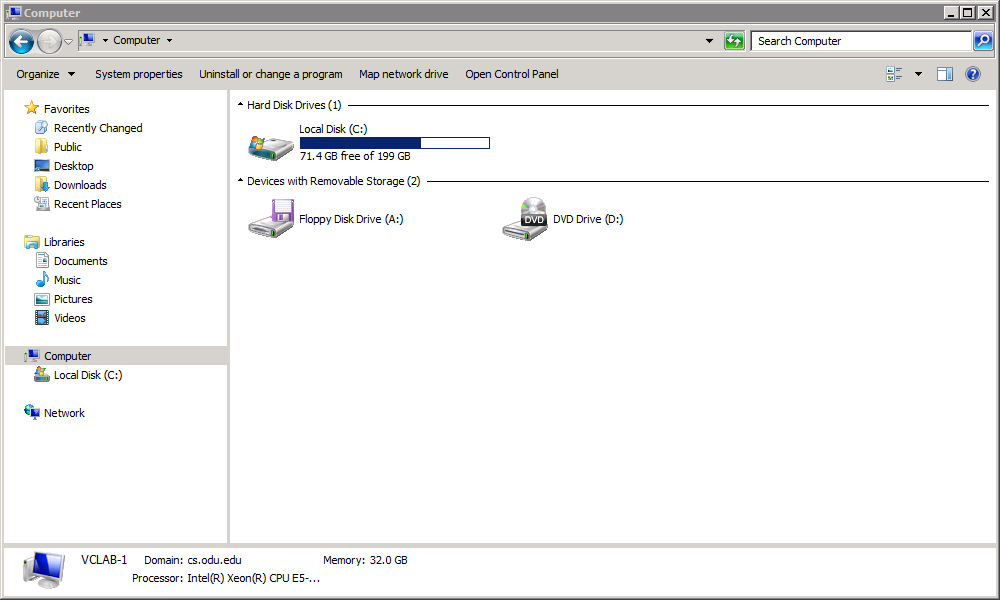
Step 1: Navigate to Computer

-
Step 2: Click Map network drive

-
Step 3: Input drive information

-
Step 4: Click Finish

-
Step 5: Input your credentials

-
¶ Access from macOS
-
Step 1: Select Finder and use key
⌘-K

-
Step 2: Input drive information and click
+(you only need do this once)

-
Step 3: Select the drive and click connect

-
Step 4: Input your credentials
